How to Add Projects With Group Functionality
You may add a group with a forward facing project anywhere in the site. To add a group that contains a project, please do the following:
Set the Project as Your Group's Home Page
Create a Group
Add a group under one of the tabs by following the instructions outlined here. Add the usual portlets, and request any additional portlets from the portal administrator.
Add a Workspace Folder to Your Group
Unlike traditional groups, groups with forward facing projects require an additional folder for the group to work in.
1. Add a folder in your group folder titled Workspace.
2. To the Workspace folder, add the Calendar folder with the Events Inbox folder and collections (Calendar, Next 30 Days, List View).
3. Add a front page collection to your Workspace folder as detailed here.
Add a Project Content Type to Your Group
1. Add a Project content type to your group folder from the Add new drop down menu. Select the necessary criteria that describes your project and click Save.

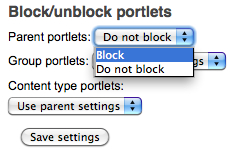
2. Block portlets on the project that you just added. You may do this by:
A.) Clicking the manage portlets link at the bottom of the project page.

B.) And then selecting Block from the Parent protlets drop down menu on the right side of the page. When fished click Save Settings.
Set Your Project as Your Group's Home Page
1. Move up to the top level of your project's folder. From the Display drop down menu, click on Select a content item as your default view.
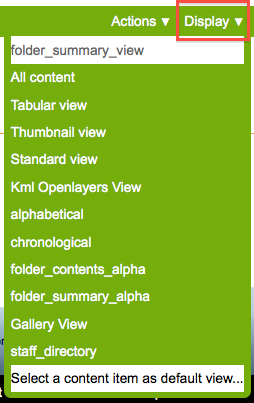
2. Select the Project that you created and click save.


